
These are my favorite accessories to use with my Leica M. If you appreciate this site and want me to earn a small commission, please buy them using my sponsored Amazon links!
Post processing
I shoot in DNG and use Lightroom Classic to process. I primarily use film simulation profiles from RNI All Films 4.
Backups
I highly recommend Backblaze. It automatically backs up my entire computer and external drives, for a reasonable price. It’s the best way I have found to use Lightroom Classic with a cloud backup of the entire library. Using this referral link will give you and me a free month.
Computer
Apple silicon has been revolutionary for photo editing. Lightroom runs much faster on even a base model MacBook Air than it ever did on my 5K iMac. Even my original M1 MacBook Air with 8GB of RAM breezed through 47MP Leica Q2 DNGs. Power consumption is so low that I can do heavy editing on a plane without worry, and I keep my laptop charged with a tiny 30W power supply from Anker.
In my opinion, the main reason to upgrade to the MacBook Pro is the convenience of having a built-in SD card reader. Otherwise, a MacBook Air is more than capable. Amazon tends to have the best prices.


Strap
CANPIS leather strap from Amazon
I like brown leather straps and have used several over the years, most of which cost over $100. I’ve found there’s no reason to pay 100 bucks for a single strap of leather. This Chinese strap from Amazon looks and feels great and only costs about $20.


Bag
Peak Design Everyday Backpack 20L
I’ve been using this for at least five years and it’s been great for carrying all of my camera gear, plus my tripod (see below), plus other things like water bottle, food, laptop, sunglasses, etc.
The side zips make it almost as easy as a sling bag to switch lenses. The downside is the compartments are designed for SLR/mirrorless lenses and are comically large for rangefinder lenses. But this is still the best backpack I’ve found for carrying my Leica gear.


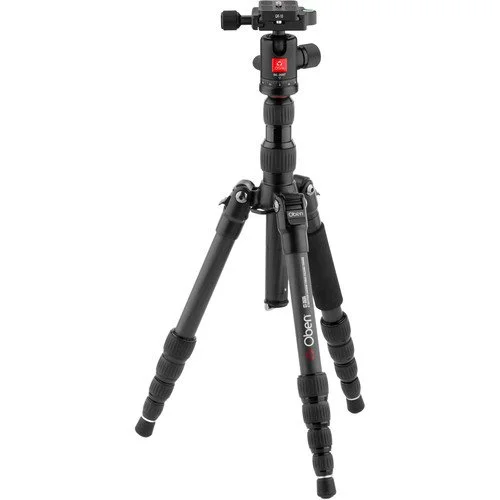
Tripod
Oben CT-3535 Carbon Fiber Travel Tripod with BE-208T Ball Head
The most popular professional-quality tripods are complete overkill for Leica users since our bodies and lenses are vastly lighter than most other brands. These full-size tripods are unnecessarily expensive, and so large and heavy that it’s harder to justify bringing them with you.
I’ve found that the best tripod is the one I have with me, and I bought this one because it was the smallest and lightest high-quality tripod I could find. It’s significantly smaller and lighter than the Peak Design tripod. I love that I can easily carry it with my backpack (see above) and it weighs just 2.5 lbs. Its carrying capacity of 9lb is plenty for my gear and I’ve found it to be stable enough for long exposures. The only downside I’ve found is that it only gets about 5ft tall.
Honestly, this is one of the most useful photography purchases I’ve made. I’ve gotten a lot of pictures that wouldn’t have otherwise been possible, because this tripod is so portable that I can actually have it with me for the duration of a trip.
Tripod plates
If you’re spending thousands of dollars on a Leica camera and you frequently use a tripod, you absolutely should spend the extra money for a proper tripod plate:
Leica M11 plate
RRS Q3 plate
Macro filter
If you have an M camera with liveview and wish that you had the option of focusing closer than 0.7m, I recommend trying a macro filter. I bought a +3 diopter filter for my 35 summilux FLE for about $30. With this attached, I can take food pictures in the 30-50cm range. Image quality is excellent as long as I stop down to f/2.8. I don’t think hardly anyone uses these filters but it’s a much cheaper way to add macro capability to an M camera than buying a specialty lens or an extension tube (or the macro filter that Leica offers for $450). You can calculate how many diopters you’d like using the calculator at this link.

Here’s two samples using my 35 summilux with the B+W +3 macro filter attached:

Leica 35 Summilux FLE @f/2.8, +3 macro filter, Leica M10

Leica 35 Summilux FLE @f/2.8, +3 macro filter, Leica M10